this article mainly introduces Caterpillar 311F LRR- JFT Crawler Excavator Engine Crankshaft main bearing –Installation
Installation steps

CAT Caterpillar ET 3 Diagnostic Adapter 317-7485/478-0235 Diagnostic Tool-high quality
pay attention to
This procedure must only be used for the removal and installation of the main bearing bearing bush while the crankshaft is in place. The removal steps and installation steps for each pair of main bearing tiles must be completed before removing the next pair of main bearing tiles.
pay attention to
1. Ensure that the main bearing bearings are clean and free from wear or damage. Replace the main bearing bearing bush if necessary.
Note: If the main bearing bush is replaced, check if the larger main bearing bush is previously installed. If the thrust washer is replaced, check if the enlarged thrust washer has been previously installed.
2. Clean the shaft collar of the crankshaft. Check the crankshaft collar for damage. Replace the crankshaft or repair it, if necessary.

Caterpillar ET 2024A & 2023C & 2019C Electronic Technician Diagnostic Software Download and Installation
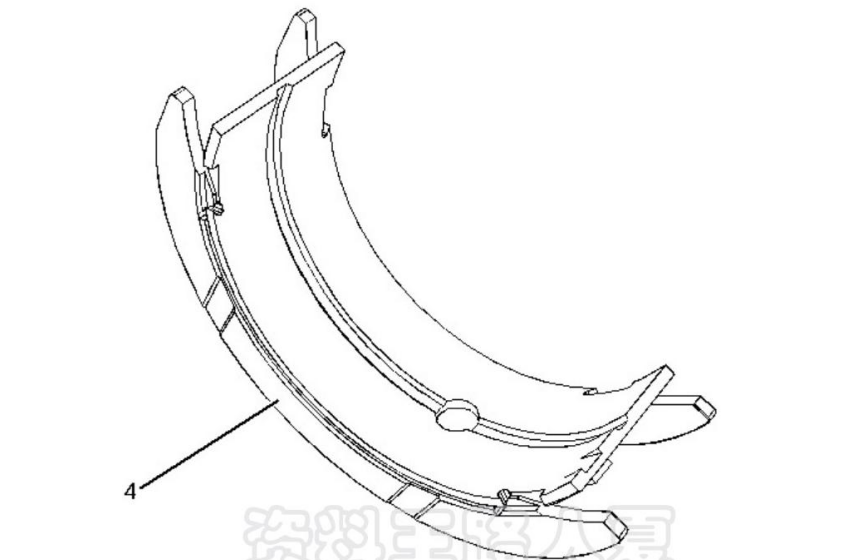
3. For the No.3 main bearing, ensure that the two thrust washers (4) are clean and free from wear or damage. Replace the stop washer if necessary. Lubricate the thrust washer with a clean engine oil (4).
Note: There is a groove and oil hole.
4. Lubricate the crankshaft journal and main bearing upper shaft bush with clean engine oil (8). Curthe main bearing upper bush (8)
Slide in place between the shaft journal and the cylinder block. Ensure that the shaft socket on the main bearing is properly seated into the groove of the cylinder block.

5. Install the main bearing lower bearing bush (3) into the main bearing cap (2). Ensure that the projection of the main bearing is positioned seated into the groove of the bearing cover.
Note: The lower bush of the main bearing is a common bush without oil holes.
6. Lubricate the crankshaft journal and main bearing underaxle bush with clean engine oil. Install the main bearing cap (5) into the cylinder block.
Note: Make sure that the main bearing cap is oriented correctly. The positioning of the upper and lower tiles shall be on the same side of the engine.
7. Lubricate the threads of the bolts (4) with a clean engine oil. Lubricate the end bottom surface of the bolt (4) with a clean engine oil.
8. Install the bolts (4) into the main bearing cap (5). Tighten the bolts evenly to pull the cover (5) in place. Ensure that the bearing cap is seated properly,
Note: Do not tap the main bearing cap in place, otherwise the bearing bush may be squeezed out.
9. Tighten the bolts (4) to an initial torque of 50 N-m (37 Ibft).
10. Tighten the bolts (4) to a torque of 80 N·m (591 bft).
Use tool (B) to turn the bolts an additional 90 degrees clockwise to achieve the correct final torque.
11. Check the axial clearance of the crankshaft. Using the tool (C), measure the crankshaft axial clearance. See Skills for the correct information
Surgical Specifications, "Crankshaft".
12. Remove the tool (C)
Caterpillar 18 Digits Factory Password Calculator One-Time Calculate Service
End By:
a. Install the balancer, if necessary. For the correct steps, see Disassembly and Assembly, "Balancer-Install".
b. Install oil pipe and engine oil pan. For the correct steps, see Disassembly and Assembly, "Engine Oil pan-Removing and Installation".


